variable management in ci/cd pipelines
I promised some friends that I’d blog about variable and secret management in CI/CD pipelines. I’ll cover variables in this post and secrets in the next one (which hopefully won’t take me more than a week or two to get round to writing).
What’s a variable?
One of my goals when building CI/CD pipelines is that the same build/test/deployment code should be able to deploy to multiple environments. This isn’t always possible, but it’s a good thing to aim for. In order to do this, we need environment-agnostic code that we can plug environment-specific settings (e.g. a server name or a VM size setting, which may be smaller for development environments than for production) into, in order to deploy to the different environments. In the context of this blog post, these settings are variables.
The examples I give here are using Azure DevOps, but the concepts should be transferable to other tools. Screenshots are taken from the graphical interface because if you can write your pipelines as YAML, you’re probably comfortable with the graphical interface, too; but the reverse may not be true.
Source of truth for variables
I’m an advocate of storing non-secret variables in a git repo along with the code that they’re for. I do not recommend storing secrets in your repo. I usually have one variable file for environment-agnostic variables (such as an Azure tenant ids, regions, or resource group names, where these don’t differ between environments), and one variable file per environment for environment-specific variables. It looks something like this:
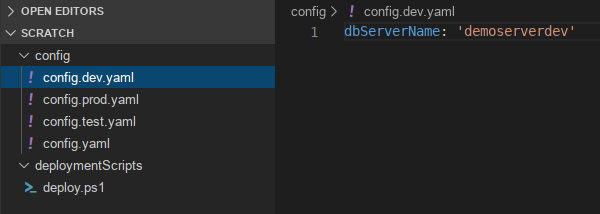
I’ve used YAML here, but JSON, XML, and PLIST can all be used in the same manner if you prefer.
I’m aware that Azure DevOps has options for storing variables inside it which are accessible through the web interface, but I find it easier to have variables in git - it also makes it easier to version-control them.
Pipeline tasks
At a high level, there are two things we need to do in the pipeline:
- Load all of the variables from files and store them in memory as environment variables.
- Get these variables into the config.
Load variables from files
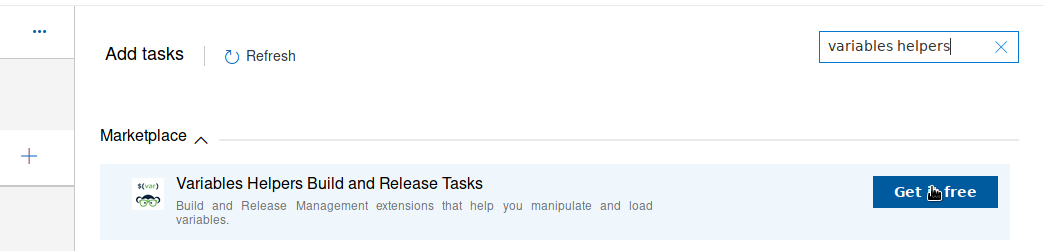
To load my variables from my YAML files, I use the Load YAML Variables task provided by Geek Learning. To use it, you’ll first need to add the Variables Helpers Build and Release Tasks package from the Visual Studio Marketplace to your account. Simply add a new task to your pipeline as you normally would, search for ‘variables helpers’ in the task list, and you should see it.
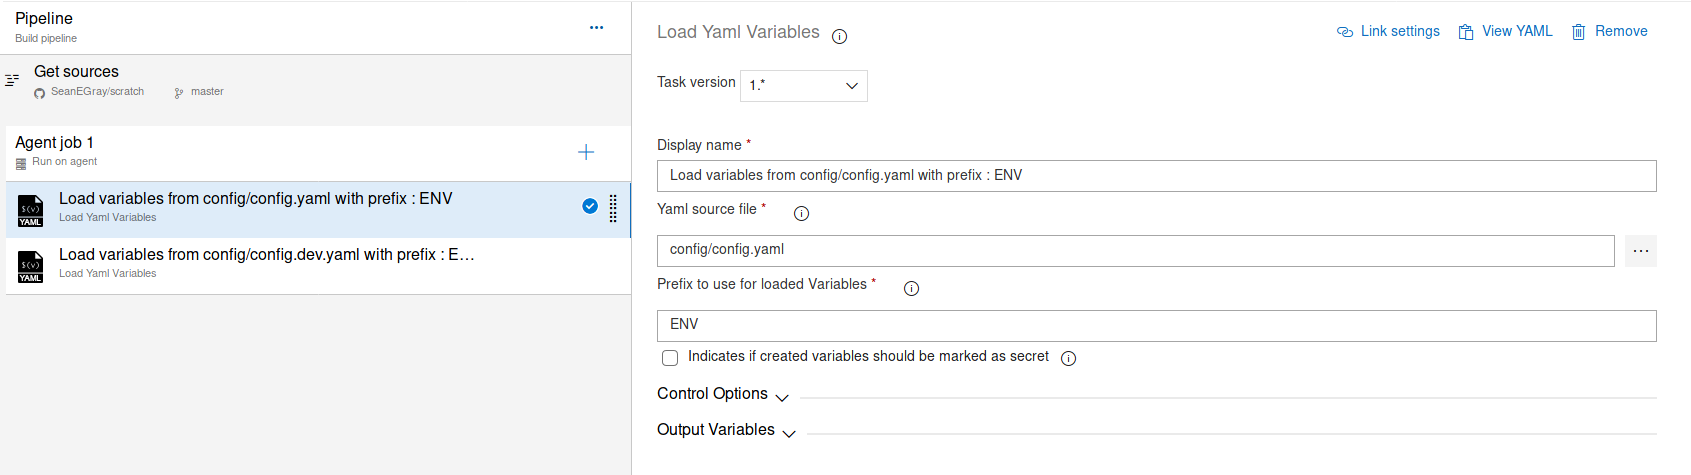
After adding that, I had to save and reload my pipeline, but was then able to add Load Yaml Variables task. This needs two settings - the path to the variable file you want to load, and a prefix which will be attached to your variable names. This means that if your prefix is ‘ENV’, a variable that was calling dbServerName in your variable file will create an environment variable called ENV_dbServerName.
I create two tasks like this - one for my environment-agnostic variable file, and one for my environment-specific variable file.
Get variables into config
Now that all of our variables are floating around as environment variables, we just need to drop them into the config. There are two basic ways that I do this:
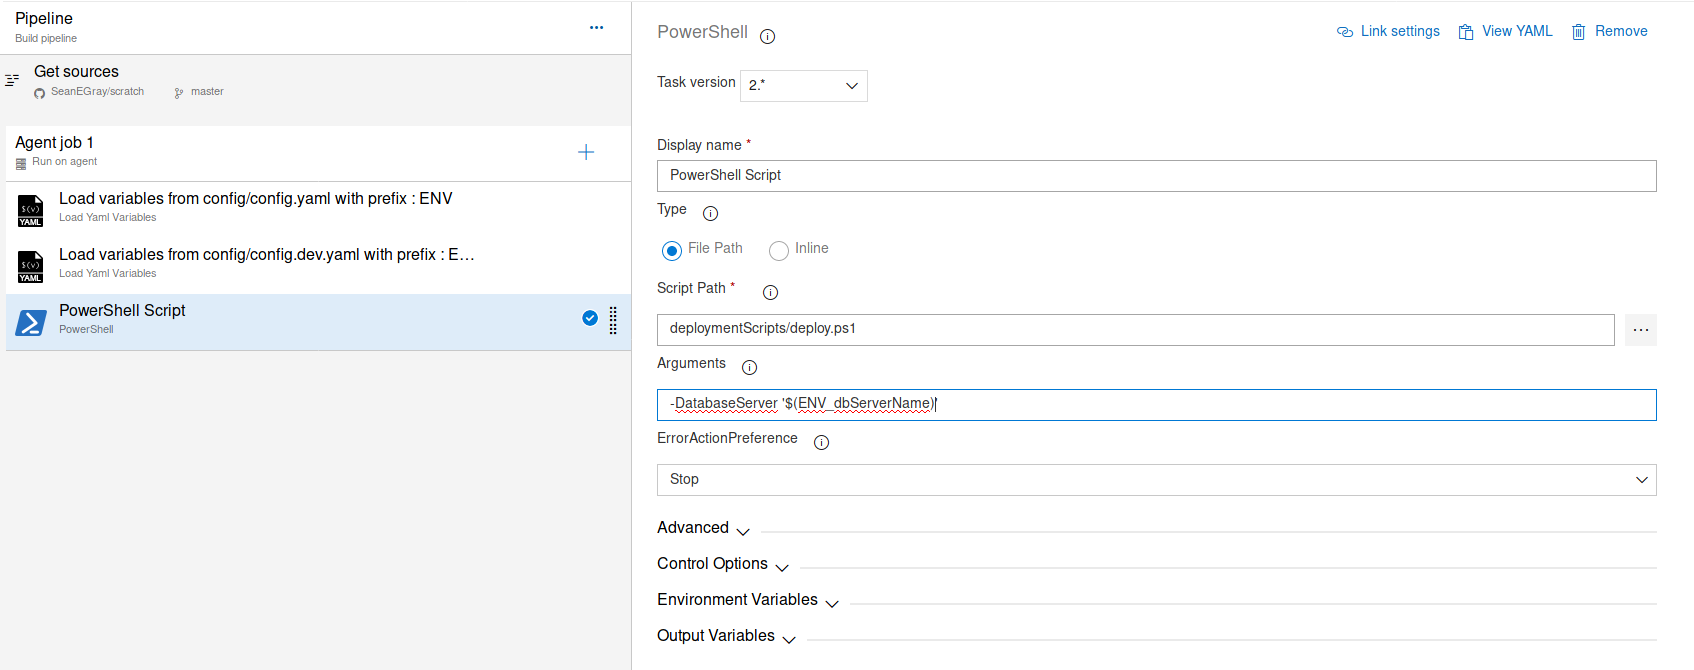
- Pass variables into tasks as parameters.
- Use a token replacement task to write variables directly into files.
The best option will depend on the specific task that’s consuming the variables.
Pass variables into tasks as parameters
This is fairly straightforward. Just use the Azure DevOps variable syntax to pass into tasks. For example, to pass our ENV_dbServerName variable into a tasks, we reference it in the task inputs as $(ENV_dbServerName).
Use a token replacement task to write variables directly into files
Sometimes it’s not possible to pass parameters into a task, so in these instances, I use a task to replace tokens directly within a file. To do this, I put a string that looks like #{ENV_dbServerName}# in the file, in the place where I want my variable to be inserted.
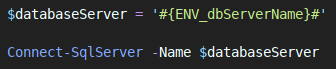
I then add the Replace Tokens task by Guillaume Rouchon to my pipeline from the marketplace. This incredibly useful task looks for the #{VARIABLENAME}# pattern within files and replaces it with the contents of the variable with that name. There are a lot of options that you can configure in this task but the only ones that you need to are the ones pointing to the files that you want to drop your variables into.

Once that’s done, you can just use your files as if the variables were hard-coded into them!
Other options are available
I know that this isn’t the only way to solve this problem, and I’m sure it’s not even the best way. Please feel free to drop me a line if you have other suggestions as I’m very interested to hear how other people solve this problem.